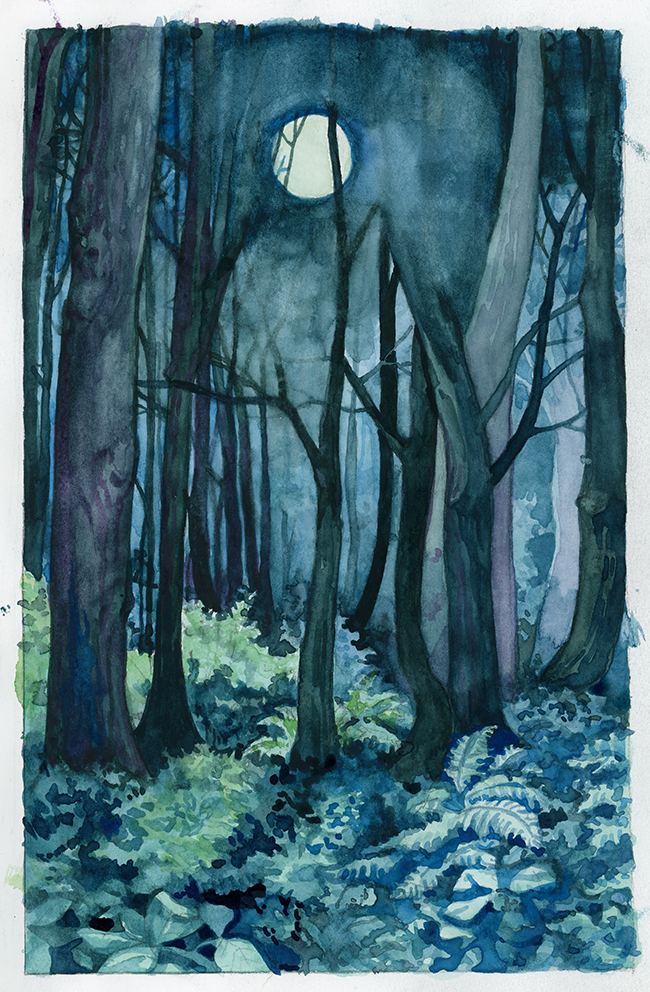
I’m going through one of those phases where I can’t seem to do anything right. Or, even if things eventually work out, it has been a one-step-forward, two-steps-backward sort of process, putting in a lot of effort to get not a lot done. All in all, I feel like I’ve been crab-walking through February. The watercolor sketch above is the second one this month that I’ve ruined, making the area around the moon a mess after about five hours of work. My prompt was to illustrate a “forest shining in the light”, and I was really happy with all of the little twigs I’d painted until I slipped and made things worse trying to fix it.
Watercolors are hard, and I realized that I hadn’t really practiced – not just the basic techniques – in a really long time. So instead of working on my big, ongoing projects yesterday, I did some basic watercolor exercises! Here are a couple of those exercises that I challenged myself with, and how I stacked up.
Exercise One: Single Color Gradient
For this exercise, draw five boxes and use each to try and create a range of five colors using one tube of paint. Each should be it’s own distinctive tint, like the colors on a paint test strip, with the darkest color at the top. Add water to dilute the paint with each box, and use a scrap of watercolor paper to test before you mark on the exercise page. Use a dark color for this exercise so that the gradient shows up well.
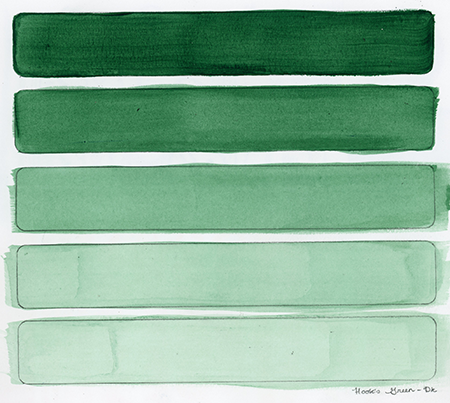
For my exercise, I traced a small ruler to get my boxes, and I used a tube of Hooker’s Green paint with a wide square brush. My gradient is pretty good, except for the last swatch. The last color should have been diluted with more water – that tint of pale green is almost identical to the one above it. I need more practice!
Exercise Two: Brushes & Mark-making
For this exercise, divide your paper into three columns. Choose a different color and a different brush for each column. Brushes that have drastically different sizes and shapes are best; you will really be able to see the difference in different kinds of marks that certain brushes can achieve. Next, use that color and brush to fill the column with any lines, marks, and interesting effects that the brush is capable of making. Repeat with each different brush and color until the page is full.
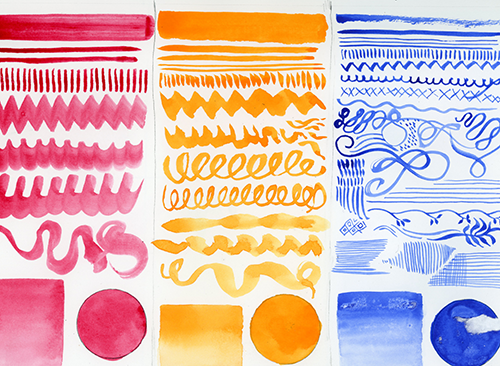
For my mark-making exercise, I used Rose Madder (red) with a medium square brush, New Gamboge (yellow) with a large round brush, and Cobalt Blue with a fine brush. This exercise was really fun, and I want to repeat it for all of my different brushes. I feel like sometimes I limit myself to just a few favorite brushes, and this makes me realize how much more each of them can actually do!
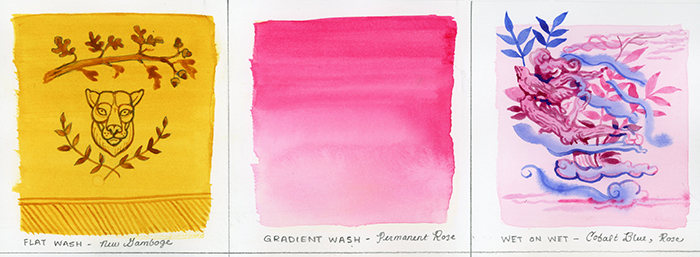
I ended the day yesterday by practicing what is (for me at least) the real challenge of watercolor painting: the washes! These are specific techniques for adding layers of watercolor to the page, resulting in different effects with the paint. Some are simple and easy, some require creativity, and some are so fiddly they’ll make you want to throw your palette out the window in frustration. I want to practice and share all of them, so they will need to be their own future posts.
So, in the end, even though I started off with a ruined painting, I ended with a bunch of new post material. Silver linings!